The Sony Discman D-10/D-100 portable CD player is a neat piece of retro audio equipment, but being introduced in 1986 means that they usually stopped working at some point. I bought a few off yahoo auctions and have a good idea what typical failure modes occur. On this page, I documented a summary of my findings, and my suggestions on how to repair the Discman.
| Failure | Count (out of 4) |
| Old grease/stuck pickup head | 4 (100%) |
| Failed plastic gear | 4 (100%) |
| Failed Laser Pickup Head | 1 (25%) |
| Failed Tantalum Cap | 1 (25%) |
| High power consumption in Standby | 1 (25%) |
| Board Failure (no repair possible) | 1 (25%) |
| LCD Bleed | 2 (50%) |
Before fixing, make sure you have carefully read the service manual.
Mechanical Failure
The most common failure is a broken plastic gear on the sled mechanism. The gear falls apart due to aging. Replacements are available on AliExpress (you need “type A”). Replacing the gear requires complete disassembly of the sled assembly, which is easiest if you unsolder a few wires, and remove it from the case.

A complete disassembly is usually anyway needed to remove old grease and lubricate the sled and gear mechanism.
Case Pieces Falling Off
If the front cover, LCD cover, Start/Stop Button or the triangular shaped cover around the open button fall off, don’t use glue to reattach them. From the factory, Sony used super-thin double-sided tape for the assembly. I use Automotive grade super-thin transfer tape to reattach the case covers. I remove the residue of the old tape, use a sharp razor to stencil out the new tape, and reinstall the components after cleaning them with Isopropanol.
Optical Pick-up Head (Laser) Failure
in some cases, the Discman fail because of worn out laser diodes. New pick-up heads are impossible to find, and second-hand lasers are the only option nowadays. I have tested the following lasers.
| Pick-up Head Name | Remarks |
| KSS-160A | Most D-10/D-100 come with this laser. |
| KSS-220A | Some D-10/D-100 come with this laser (later models). |
| KSS-225A | I salvaged this laser from a D-33. Slight trimming of the ribbon cable connector was needed, but it can be used as well. |
Electrical Failure
One D-100 had a shorted-out tantalum capacitor, shorting the main power supply and blowing the fuse.


Tantalum caps do age, and their failure mode of short circuit makes them particular dangerous. As such, I highly recommend replacing all tantalum caps on the Discman.
Recap Part List
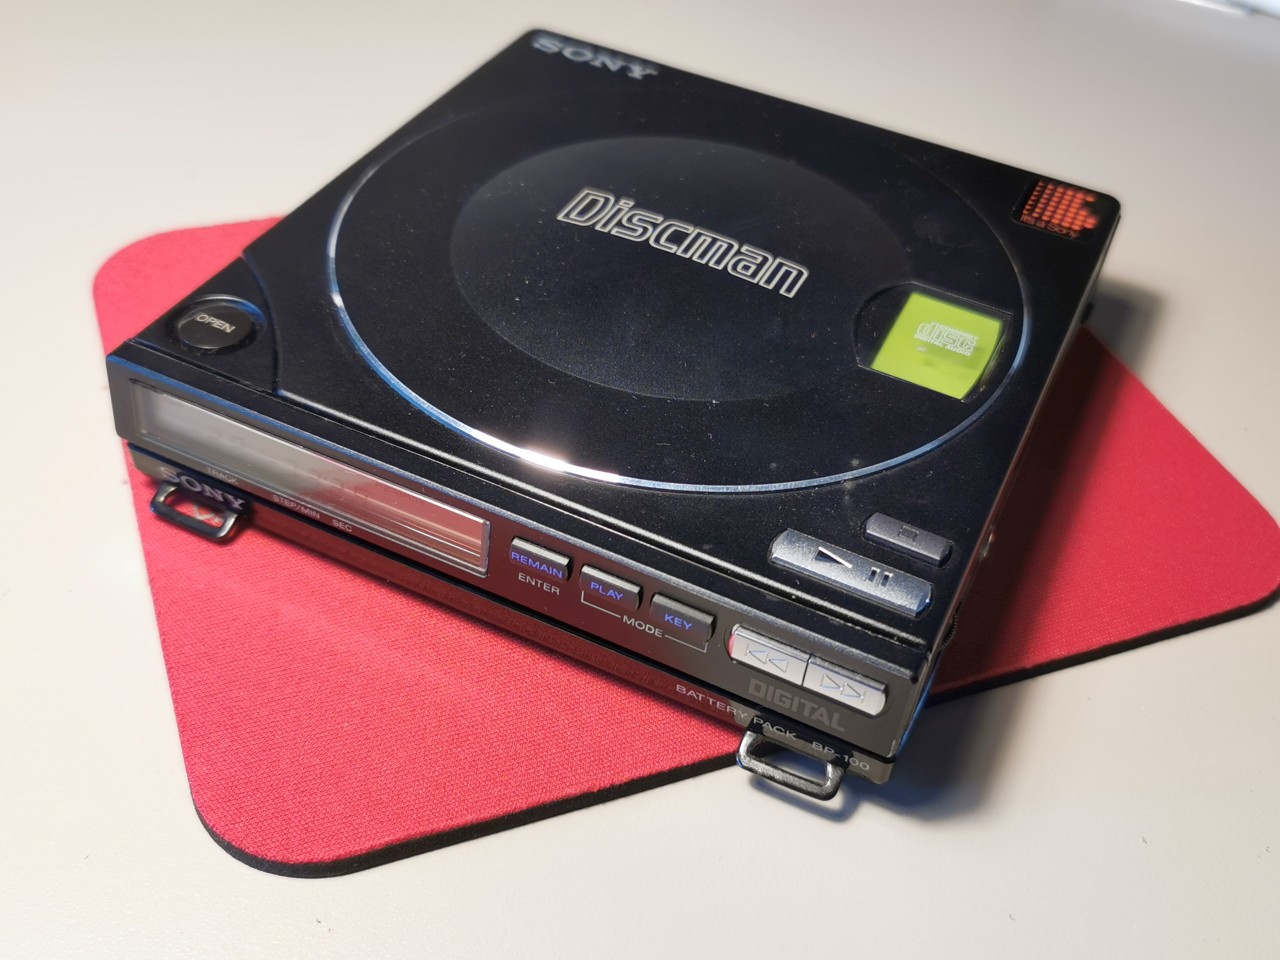
This is how my D-100 looks like after a complete recap.

Commonly Used Part List
| Part | Link | Description |
| Q407 2SB1120-F PNP power transistor SOT89 | https://www.digikey.jp/en/products/detail/nexperia-usa-inc/2PB1424-115/2119366 | The original transistor is no longer available, but better replacements can be used. I used 2PB1424 as a replacement. It has the same form factor, same voltage rating, but can conduct slightly more current (3A vs 2.5A). |
| Lock switch S802 1-554-669-00 | https://www.digikey.jp/en/products/detail/nidec-components-corporation/CSS-1210MC/1124205 | The lock switch breaks if you are not careful when assembling the main board. I have successfully replaced the original switch with CSS-1210MC, which has the same size and functionality. |
| PCB fuse “Link IC” PS401 1-532-637-21 | https://www.digikey.jp/en/products/detail/littelfuse-inc/39111000000/653528 | This was the best replacement fuse I could find. It fits the pin spacing, but is larger and has different electrical characteristics. For a more accurate replacement, NTE15008E can still be sourced occasionally, but is quite pricey. |
| Power Supply 9V | https://www.digikey.jp/en/products/detail/cui-inc/SWI6-9-N-N5/5415084 | The discman power supply uses a barrel type connector with center negative. These are hard to find. The factory power supply is not recommended to use, as the voltage output is fluctuating, and it heats up even when not charging. |
Adjustments
A lot of electronics in the D-10/D-100 requires manual tuning. You’ll need a scope to perform these adjustments. Follow the manual to adjust the positive and negative supply voltages, PLL frequency, tracking balance and focus bias adjustment. The focus bias adjustment is particularly time-consuming. Getting your Discman to read regular CDs is easy, but if you want your Discman to be able to read CD-R discs with the case closed, it is quite tricky.

If you are upgrading to a Li-Ion battery pack, you will also need to modify the charging circuit, and adjust the charging voltage to 8.3V.
Enjoy!

Troubleshooting & FAQ
| Description | Possible Solution |
| The D-100 doesn’t power on, even if plugged in. | – blown fuse (PS401). – power supply issue. – loose coils. – lock slider engaged. |
| The D-100 powers up, the display indicates 00 00:00. The disc spins up, but after a few seconds, the Discman shuts down. The sled does not move. | – stuck sled. – broken sled gear. – fully disassemble the sled. Clean and lubricate the moving parts. |
| The D-100 powers up, the display indicates 00 00:00. The disc spins up, but after a few seconds, the Discman shuts down. The sled moves to the innermost position, and a little bit back. | – check positive and negative voltages. – check electrical connections. – perform full adjustment, especially the focus bias adjustment. – observe laser RF signal for suspicious information. – check the flat-ribbon cable connector for corrosion. – replace laser. |
| The D-100 recognizes the disc and starts playing (track 1 indicating, timer starts), but the sound is crackling. The music can be recognized. | – adjust focus bias. – this sometimes seems to be unavoidable with CD-Rs. |
| The D-100 recognizes the disc and starts playing (track 1 indicating, timer starts), but the sound is crackling. It is impossible to recognize the audio. | – faulty electronics. I haven’t investigated into this issue yet. |
| Humming sound when plugged to the charger, but not powered on (i.e. no play button pressed). High standby power usage. If a battery is used, the battery is discharged quickly, even without usage. | Faulty main power switch (P-CON). Check that P-CON is high (5V) on the main MCU output. Check transistors Q405, Q406, Q407. In my case, Q407 was faulty. |