A while ago, I purchased a ThinkPad 240 online, and upon receiving it, my excitement grew as I discovered its almost pristine condition. The keyboard displayed only minimal signs of wear, and the Intel Celeron and Windows 98 stickers on the keyboard bezel appeared almost as they did in 1999.
However, the notebook did have three minor drawbacks:
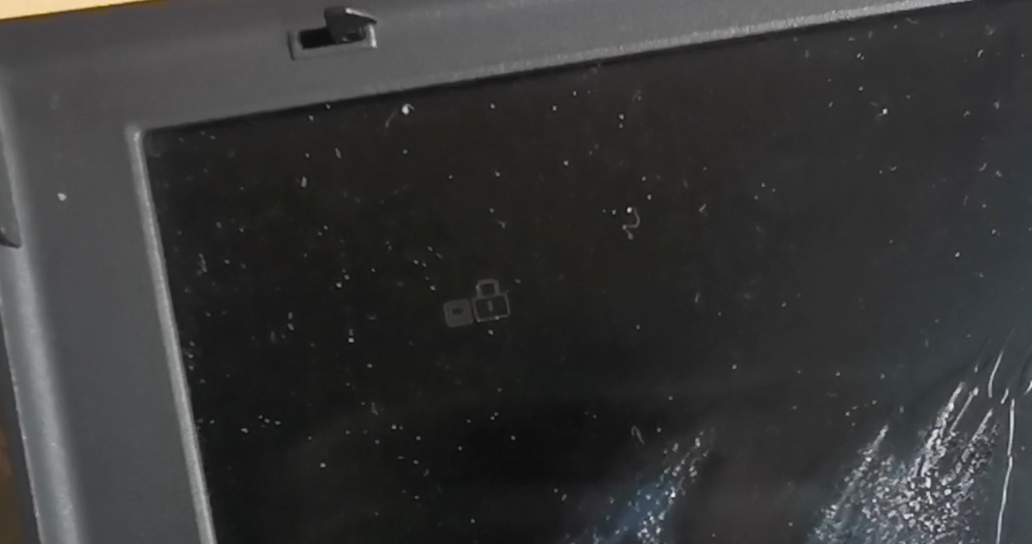
- The TFT polarizer started to disintegrate, which is a common issue with older notebooks in Japan. The high humidity in summer causes the film to dissolve.
- The system was bricked due to a BIOS password.
- The battery was not functional.
To tackle the BIOS password, I was soldering a few cables to the EEPROM, extracting its data, and utilizing some shady tools to retrieve the password from the dump. With that hurdle overcome, my attention shifted to resolving the battery problem, and I am eager to share my experience in this article.
Since there are no new batteries available for the ThinkPad 240 series, there is no other way than to repair the original battery. As such, my initial step was to open the existing battery case and examine its internals.
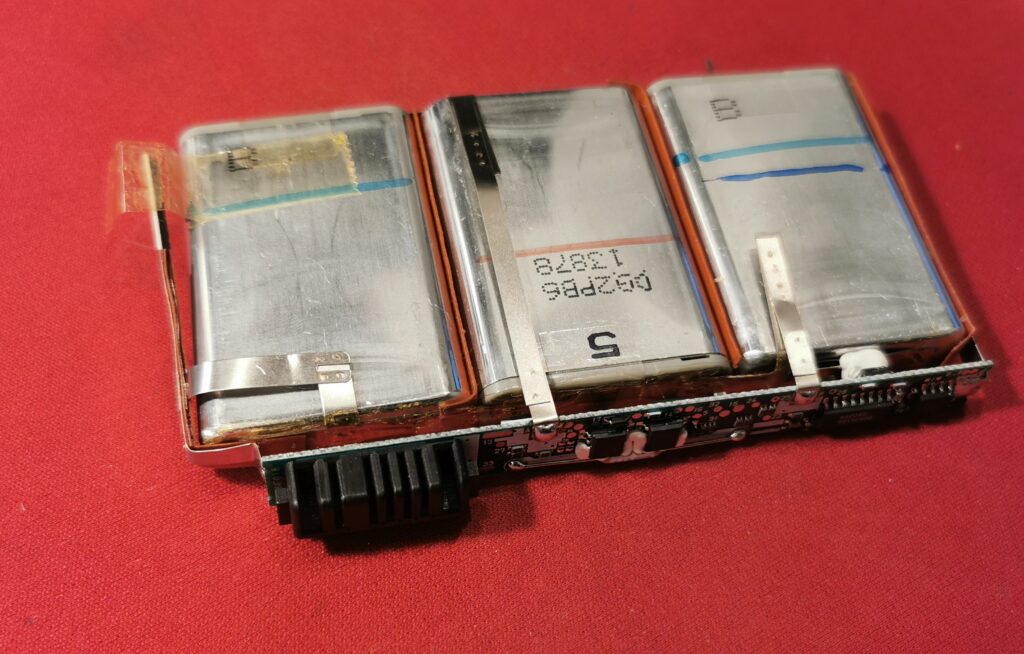
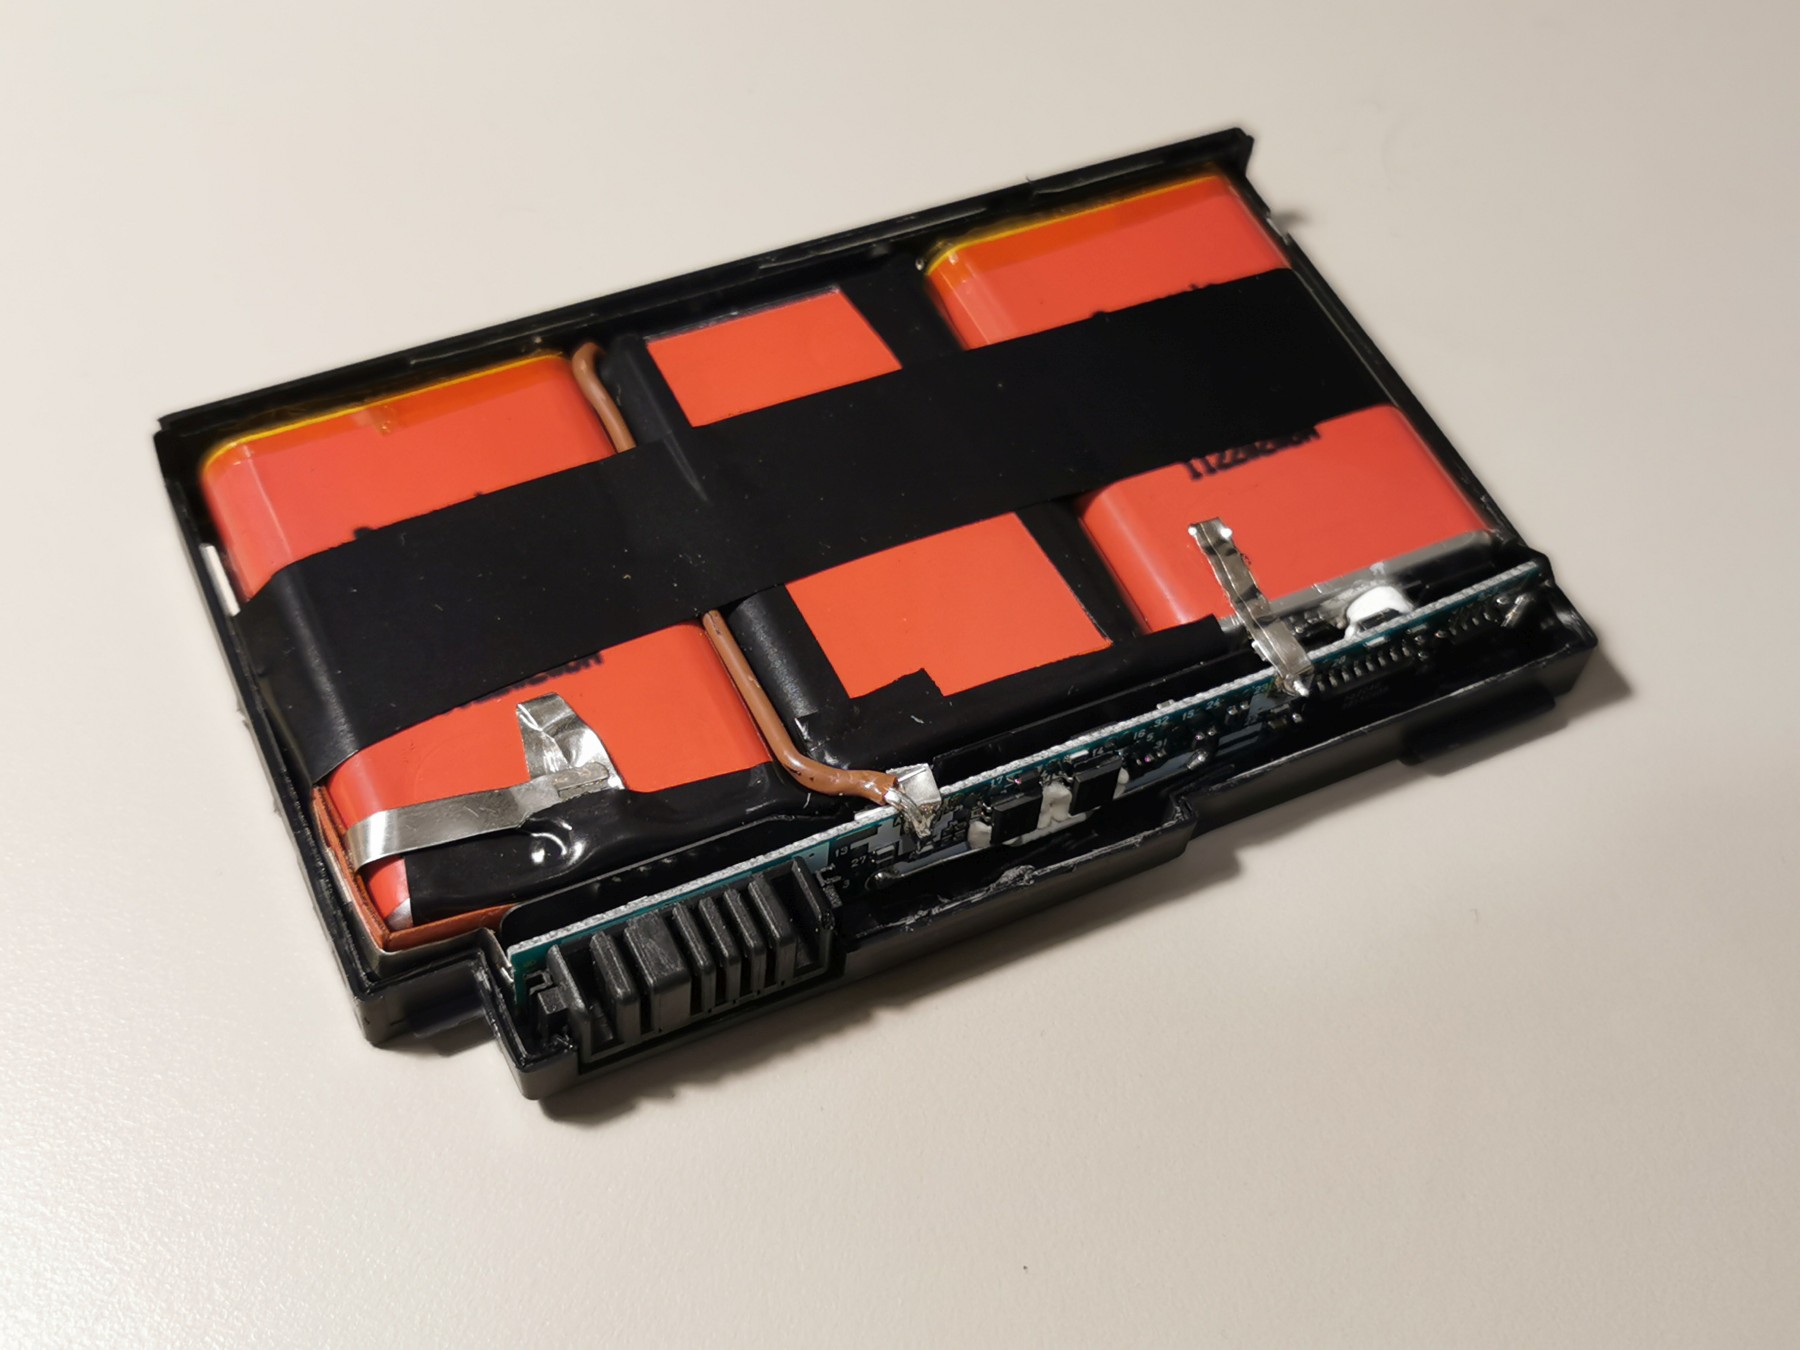
Fortunately, the ThinkPad 240 already utilized Li-Ion batteries, sparing us the hassle of dealing with outdated NiMh or NiCd batteries. The battery pack consisted of three “pouch-shaped” cells and a battery monitoring system (BMS).
Here are the specifications of the components:
- FRU: 02K6606
- Battery Controller: bq2040
- Battery EEPROM: 24C01
A fellow ThinkPad 240 enthusiast had already undertaken the task of debugging the BMS and EEPROM, but in my case, such measures were not required.
The dimensions of the cells are as follows:
- Width: 34mm
- Length: 48mm
- Thickness: 10mm
Although I couldn’t find specific information about the original cells online, I managed to source similar-shaped cells with matching chemistry. I opted for the Sanyo Li-Ion cells 3.7V / 2000mAh / 103450, which proved to be a suitable replacement. I purchased them from AliExpress, although I cannot verify their authenticity, they have functioned flawlessly so far.
Based on my experience working with other notebook batteries, I learned a crucial rule: never disconnect the BMS from the cells. Even a momentary power loss results in the BMS locking itself, effectively rendering it useless. Without access to the BMS EEPROM or expensive tooling and software, reviving the BMS becomes an insurmountable challenge.
To revitalize the battery cells, I “hot-swapped” the cells. I soldered the new cells onto the circuit first, then disconnected the old cells, all without ever interrupting power to the BMS.

On the picture above, you can see some white blob between the right-most cell and the PCB. This is likely heat-conducting material used by the BCM to identify if the cells are heating up. Before putting the battery back into the notebook, ensure that you have sandwiched the white blob between the cells and the PCB.
There was no need to reprogram the BCM. After plugging the repaired battery back to the notebook, the Windows battery gauge indicated “0%, charging”. I let the battery charge for a few hours, and could then use it without any issues.
Use glue that is suitable for ABS plastics when reassembling the case. In my initial attempt, I used the wrong glue and didn’t work very carefully, resulting in ugly glue traces on the case. So, be meticulous during this step to achieve a clean and seamless finish.

The battery lasts approximately one hour while running 90s software developer tools and occasionally compiling with Visual Studio 6. Although this may not be impressive compared to today’s standards, it’s important to remember that even during its introduction, the ThinkPad 240’s battery life was considered short, and larger batteries were available.

In the next blog post, I will address the polarizer film issue on the TFT.
